How the Color Smash Rule Works in Tunnel Rush 2 (and How to Use It)
Published · 3 min read
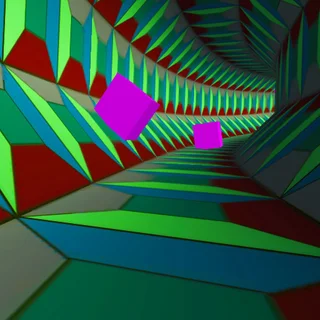
Most people play Tunnel Rush 2 the way they played Tunnel Rush: find the gap, roll into it, repeat. That works for about six levels. After that the sections are built so that there is no clean gap, only a gap in your color, and if you never learned to aim at blocks the game feels impossible. Here is what the rule does under the hood, taken from how the game checks a hit.
What counts as a smash
Every obstacle in the tunnel has a material color, and your ship has one too. When the ship's collision ray touches a block, the game checks three things in order. Does the block's color match the ship's? Then it smashes: the block is marked broken, a burst of particles in your color spawns at the ship, the camera shakes a little, and the crash flag is cleared. Was there a correct smash in the last 0.05 seconds? Then this block smashes too, whatever its color. Is the boost active? Then it smashes. Only if all three fail does the ship crash.
That middle check is the one nobody knows about. It exists so that two blocks touching each other do not kill you when you legitimately smashed the first, but it means a tight cluster of mixed colors can be entered safely as long as the first thing you touch is your color. Enter a spiral on a matching block and you can carry through the next one even if it is wrong. Enter on the wrong block and it ends immediately.
Rings set the line
The recolor rings (the game calls them triggers) are placed before the sections that use them. A section generator picks two colors, drops a ring in the first color, and then builds walls where the first color is the passable one. If you skip the ring, you arrive at a wall pair built for the other color and there is nothing to do about it. So the ring is not optional. Roll to it early, pass through, and start reading the next section for blocks in the new color. On a new level the ship's starting color is set by the level itself, usually red, blue or green, so glance at the ship before the first section.
Gems and the star
Gem sections are separate from obstacle sections: four hex gems at 90 degree spacing, or a pair, spaced along a short stretch with nothing else in it. They are worth collecting on the levels you can already clear, because the ship prices climb steeply: 100 gems for the Mustang is a few levels of play, 1,500 for the Viper is not. The boost star is placed once per level and never in the last 500 units. Picking it up multiplies your speed by up to two (less on already fast ships) and turns every block into a smashable one for the duration. You cannot crash during a boost, so the right move is to go straight and use the seconds to spot your color in the section you will come out in.
Speed and difficulty, in numbers
Your forward speed is a multiplier built from the ship and the setting. Every ship starts at 0.4 plus a fifth of its speed stat (the Falcon's stat is 1.0, the Viper's is 2.0), then Easy adds 0.5, Med adds 0.75 and Hard adds 1.0. On top of that, levels 1 to 5 are scaled down by 10% and levels 6 to 10 by 5%. So an Easy Falcon on level 2 runs at about 1.0, a Hard Viper on level 12 at about 1.8. The setting matters far more than the ship. If you want the tunnel easier, change the button on the title screen, not the hangar.
The level-end offers
After a crash the level-end screen may show a second button. It picks one of three offers at random from whichever are available: Start With Boost if you crashed at least twice on this level, Continue From Here if you have not used a continue on this level yet, and Double Your Gems if you collected 20 or more in the run. In this build they are granted straight away. Continue is the valuable one; it is capped at one per level, so save it for the level you cannot finish.
More from the blog
- Falcon, Mustang, Phasor, Dragon, Viper: Which Tunnel Rush 2 Ship to Buy
Every ship's price, unlock level, speed and handling from the game's own data, and an honest answer to whether any of them are worth the gems.